
Looker Studio Pro: Master Team Workspaces & Automated Reports
Are you drowning in a sea of disorganized reports, struggling to find what you need when you need it? Tired of manually sending reports to your team or clients every week? If you're nodding along, you're in the right place! In this blog post, we'll explore two game-changing features of Looker Studio Pro that will transform the way you manage and share your reports: Team Workspaces & Folders and Automated Report Delivery.
As an instructor of the Looker Studio Masterclass, I've seen countless analytics professionals struggle with these exact challenges. The good news? There's a better way to work, and it doesn't have to cost thousands of dollars to implement.
Understanding Team Workspaces & Folders: Your Reporting Command Center
What Exactly Are Team Workspaces?
Think of Team Workspaces as dedicated environments where your team can collaborate on reports and data sources. Unlike the free version of Looker Studio where assets belong to individual users, in Looker Studio Pro, these assets belong to your organization.
This is a crucial distinction: in Looker Studio Pro, your reports and data sources belong to your organization, not to individual team members.
Why does this matter? Imagine Sarah from your analytics team creates an amazing dashboard for your biggest client. Then Sarah leaves the company. In the free version, that dashboard technically belongs to Sarah, creating a potential nightmare scenario. With Team Workspaces, the organization maintains ownership and control, regardless of who comes and goes.
Folders: Bringing Order to the Chaos
Within each Team Workspace, you can create a hierarchy of folders and sub-folders to organize your assets. Gone are the days of relying solely on naming conventions to find what you need!
You can organize folders by:
Client name
Department
Project type
Report status (development vs. production)
The flexibility is yours, and you can easily move assets between folders as your organizational needs evolve.
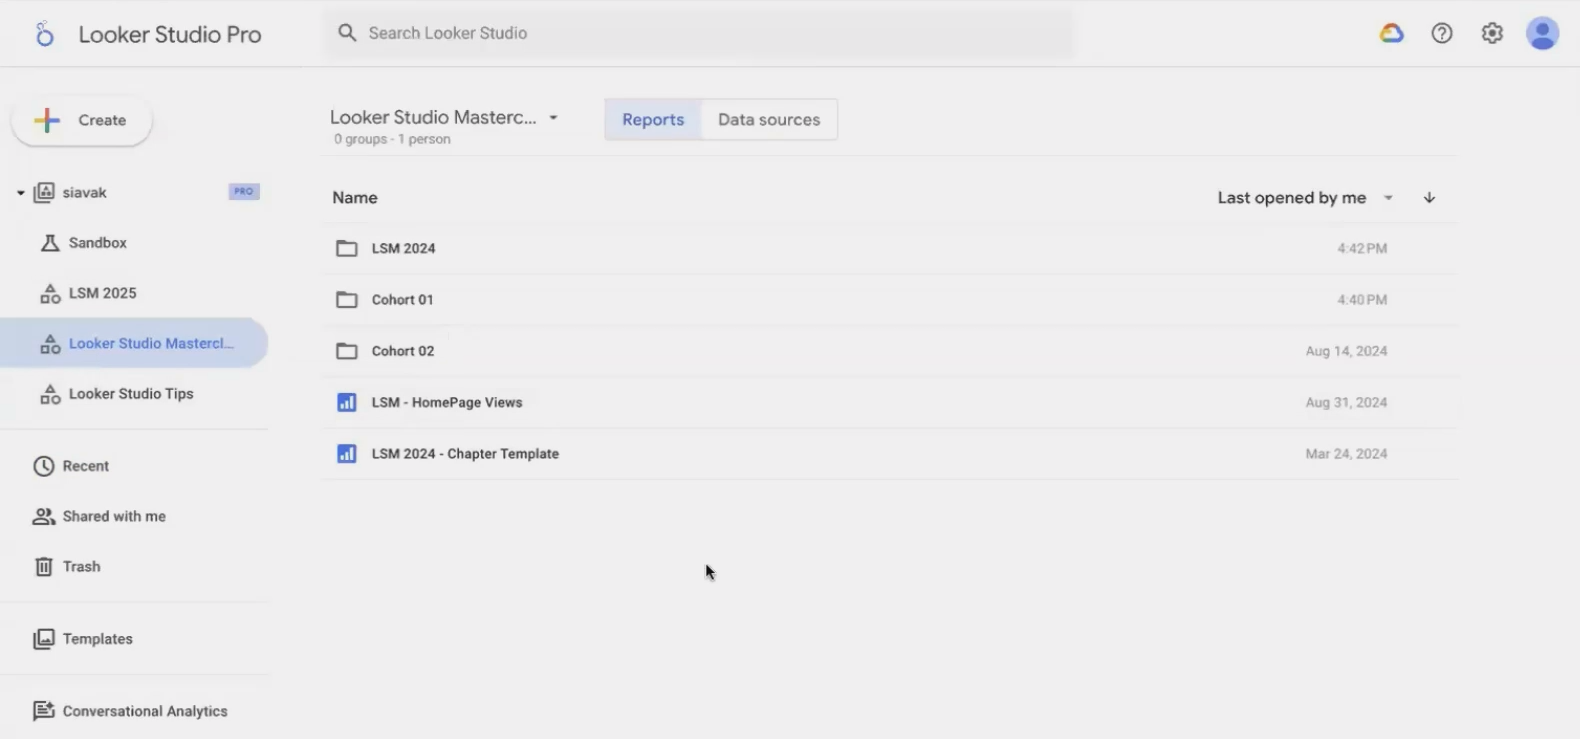
A well-organized Team Workspace with folders for different clients and projects makes finding the right report a breeze.
Setting Up Your First Team Workspace
Creating a Team Workspace is refreshingly simple:
Click on Create in your Looker Studio homepage
Select Team Workspace
Name your workspace (e.g., "Client Reports 2025")
Start adding folders and organizing your assets
Once your workspace is created, you can begin moving existing reports into it, or create new reports directly within the workspace.
Managing Access: The Right People, The Right Permissions
One of the most powerful aspects of Team Workspaces is the ability to manage access at the workspace level. Instead of sharing reports individually, you can add team members to a workspace and they'll automatically have access to everything within it.
Looker Studio Pro offers four distinct access roles:
Viewer: Can only view assets and folders
Contributor: Can view and edit all assets
Content Manager: Can manage members (add or remove)
Manager: Complete control over the workspace, including removing folders and assets
This means you can onboard a new team member with just a few clicks, giving them immediate access to all the reports they need.
Automated Report Delivery: Set It and Forget It
Going Beyond Basic Scheduling
If you've used the free version of Looker Studio, you're probably familiar with the basic scheduling feature, allowing you to email a PDF of your report to recipients on a regular basis. But what if you need to send different versions of the same report to different stakeholders? Or what if some people need daily updates while others only need weekly summaries?
That's where Looker Studio Pro's enhanced report delivery comes in.
Multiple Schedules for the Same Report
With Pro, you can create up to 20 different schedules for a single report, each with its own:
Recipient list (up to 50 email addresses per schedule)
Selected pages to include
Delivery frequency (daily, weekly, monthly, or custom)
Custom email subject and message
This flexibility is a game-changer for teams that need to share different views of the same data with various stakeholders.
Create different schedules for different audiences, sending only the pages they need to see
Beyond Email: Google Chat Integration
In addition to email delivery, Looker Studio Pro allows you to send reports directly to Google Chat, making it easy to integrate your data reporting into your team's daily communication channels.
This integration is particularly useful for teams that use Google Workspace, as it keeps everything within the same ecosystem and reduces the need to switch between different platforms.
Setting Up Your First Advanced Schedule
Creating a custom schedule is straightforward:
Open your report in view mode
Click the Share button
Select Schedule delivery
Configure your first schedule (recipients, pages, frequency)
Click Save
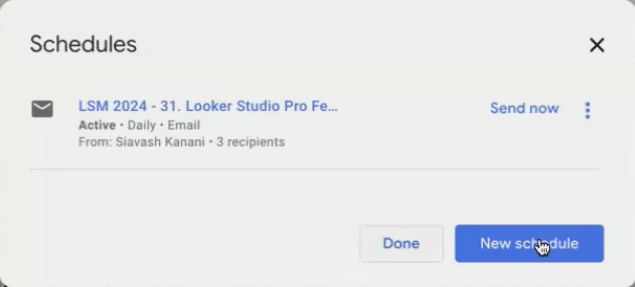
Click Create new schedule to add additional schedules
Each schedule you create can be edited or deleted independently, giving you complete control over your report distribution.
Practical Examples: Putting It All Together
Let's look at how these features might work in real-world scenarios:
Scenario 1: Agency with Multiple Clients
An agency with 15 clients could create:
A main Team Workspace for all client work
A folder for each client
Sub-folders for "Development" and "Production" reports
Different schedules for each client, sending reports to both the client team and internal account managers
Scenario 2: In-House Marketing Team
A marketing team might organize by:
Separate Team Workspaces for "Marketing Analytics" and "Executive Dashboards"
Folders for different marketing channels (Social, PPC, SEO)
Daily report delivery to marketing specialists
Weekly summary delivery to marketing directors
Monthly overview delivery to C-suite executives
The combination of organized workspaces and customized delivery schedules creates a reporting ecosystem that practically runs itself.
Frequently Asked Questions (FAQs)
If I move my reports to a Team Workspace, will it affect people outside my organization who currently have access?
No, existing access permissions will be maintained. Anyone who could view or edit your report before will still be able to do so after you move it to a Team Workspace.
Do I need to upgrade everyone in my organization to Pro?
Not at all! Only the users who need to create and manage Team Workspaces, folders, and advanced schedules need Pro licenses. Users who simply need to view or edit reports can continue using the free version.
What happens to scheduled reports if I delete a Team Workspace?
Any scheduled reports within a deleted workspace will be canceled. Make sure to move important reports to another workspace before deleting.
Can I filter the data differently for different scheduled deliveries?
While you can select different pages to include in each schedule, the data filtering is based on the default state of the report. To send differently filtered data, you would need to create separate reports.
Can I send scheduled reports to people outside my organization?
Yes, you can add any email address as a recipient for scheduled reports, regardless of whether they're part of your organization or have a Looker Studio account.
Is Looker Studio Pro Worth It?
At $9 per Pro user per month, Looker Studio Pro offers significant value for organizations that:
Need to maintain control over their reporting assets
Want better organization and collaboration features
Require more flexible report delivery options
For many teams, even having just one or two Pro users who manage the workspaces and schedules can dramatically improve their reporting workflows.
The pricing has become much more transparent and accessible in 2025, making it a viable option for organizations of all sizes. Gone are the days of contacting Google sales representatives for custom quotes; now you can simply sign up and start using the Pro features immediately.
Team Workspaces, folders, and enhanced report delivery are just a few of the powerful features that make Looker Studio Pro a worthwhile upgrade for serious data professionals. By implementing these organizational and automation tools, you can:
Secure your reporting assets at the organizational level
Create logical, easy-to-navigate structures for your reports
Automate personalized report delivery to various stakeholders
Save countless hours of manual work
If you're spending too much time managing reports and not enough time analyzing data, these Pro features might be exactly what you need to take your reporting to the next level.
Note:
This post is based on a subject covered in the Looker Studio Masterclass Program. To learn more about Looker Studio Masterclass, click here.